 Introduction
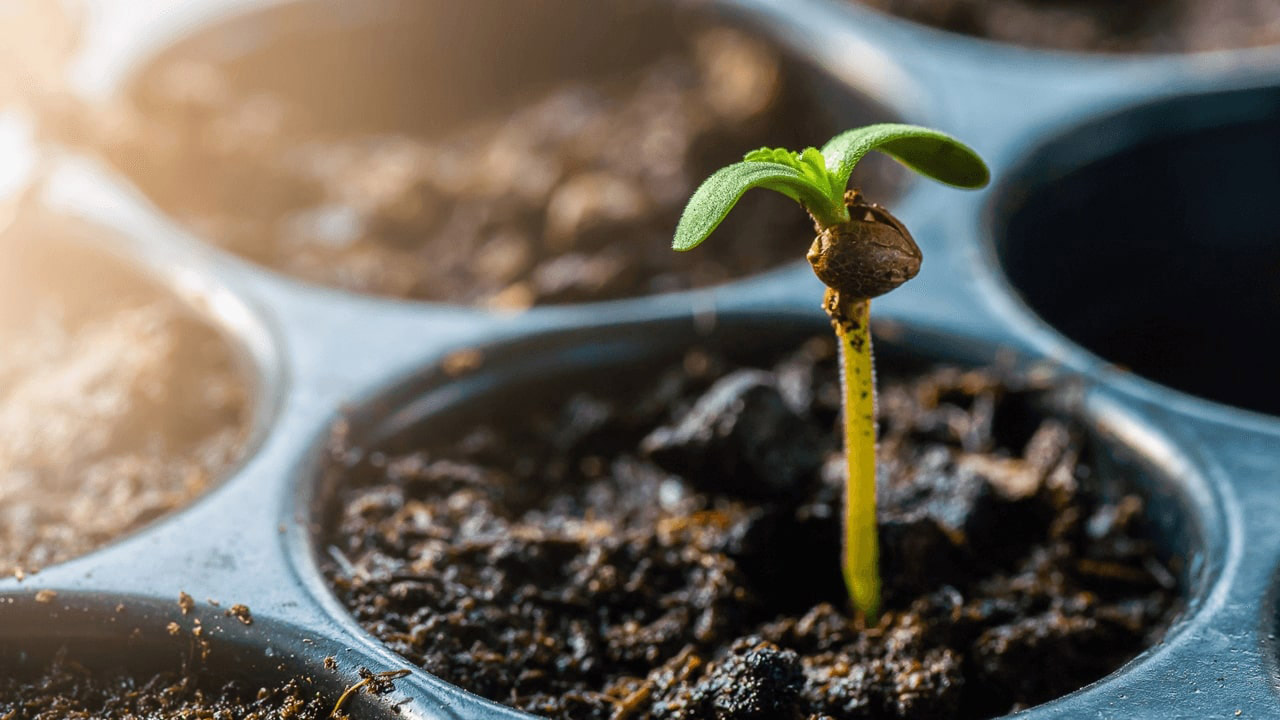
Germinating cannabis seeds is the crucial first step in the journey to growing your own cannabis plants. Whether you're a novice grower or an experienced cultivator, mastering the art of germination is essential for ensuring a successful and bountiful harvest. In this comprehensive guide, we'll walk you through the entire process of germinating cannabis seeds, from selecting the right seeds to caring for your seedlings as they emerge. Choosing High-Quality Seeds Before you begin germinating cannabis seeds, it's essential to start with high-quality genetics. Look for reputable seed banks or breeders known for producing reliable and stable genetics. Consider factors such as strain variety, potency, and desired effects when selecting your seeds. Additionally, ensure that your seeds are fresh and viable, as older seeds may have lower germination rates. Materials Needed for Germination Gathering the right materials is essential for successful seed germination. Here's what you'll need:
The Germination Process
Conclusion Germinating cannabis seeds is an exciting and rewarding process that sets the stage for a successful growing season. By following the steps outlined in this guide and providing your seeds with the right conditions and care, you can ensure a high germination rate and healthy seedlings ready for transplanting. Whether you're a beginner or an experienced grower, mastering the art of germination is essential for achieving bountiful harvests of top-quality cannabis buds.
0 Comments
 Growing cannabis outdoors can be a rewarding experience, providing you with a natural way to cultivate your plants. It allows the cannabis to grow under the sun, which can lead to robust growth and potent yields if done correctly. This guide will walk you through the essential steps to grow cannabis from seeds outdoors.
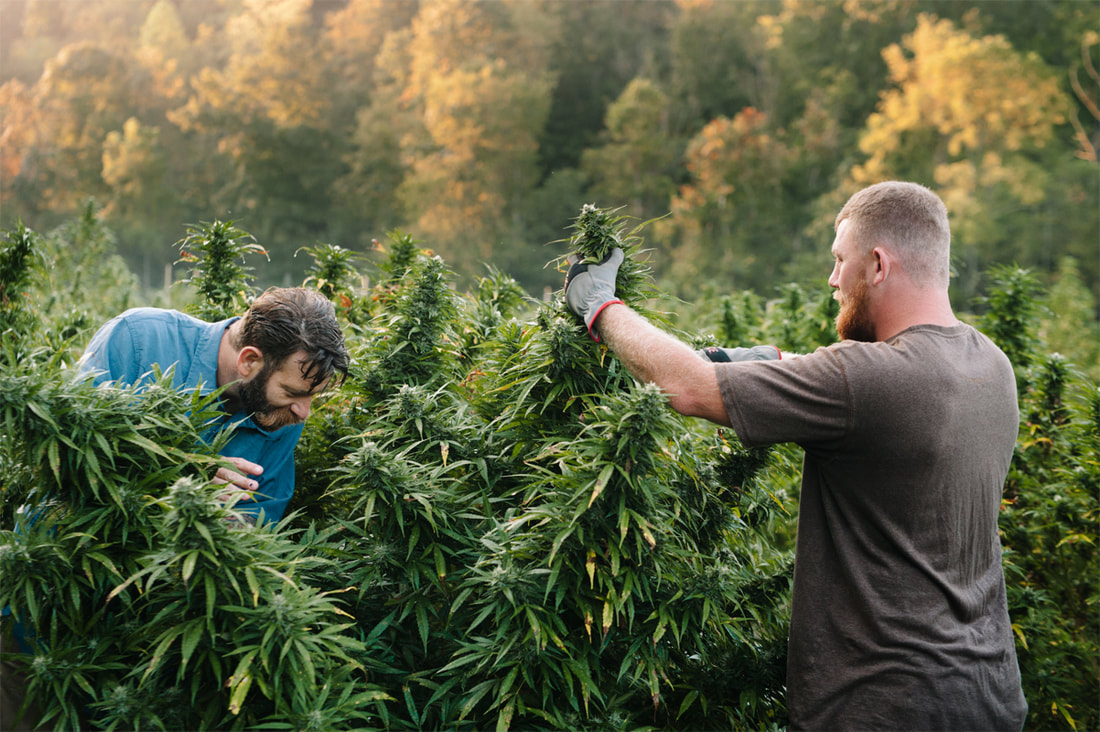
Step 1: Choose the Right Seeds Before you begin, selecting the right cannabis seeds is crucial. Consider the climate of your area and the growing season length. Sativa strains generally prefer warmer climates with longer seasons, while Indicas are better suited for cooler climates with shorter growing periods. Autoflowering seeds can be an excellent option for beginners as they flower based on age rather than light conditions. Step 2: Understand Legal Considerations It’s vital to be aware of the legal landscape regarding cannabis cultivation in your area. Many regions have specific regulations about how many plants you can grow and where you can plant them. Ensure you comply with local laws to avoid legal complications. Step 3: Start Seeds Indoors Starting your seeds indoors can help protect them from harsh conditions while they are still fragile. Begin by planting your seeds in small pots with a seed starting mix. Keep the soil moist but not waterlogged, and place them in a warm, sunny spot or under a grow light. After about 2-4 weeks, once the risk of frost has passed and your seedlings have at least two sets of true leaves, they are ready to be moved outdoors. Step 4: Choose the Right Location Choosing a good location is essential for the health of your cannabis plants. The ideal spot will have good soil, plenty of sunlight, and some protection from strong winds. Cannabis plants need at least 6-8 hours of direct sunlight daily to thrive. Step 5: Prepare the Soil Good soil is the foundation of a healthy cannabis garden. The soil should be rich in organic matter and have good drainage. Amend your soil with compost, manure, and other organic materials. You might also want to have your soil tested to adjust pH levels accordingly; cannabis prefers slightly acidic to neutral soil (pH 6.0-7.0). Step 6: Transplanting When transplanting your cannabis plants outdoors, carefully remove them from their pots to avoid damaging the roots. Dig a hole in your prepared soil that is twice the size of the root ball. Place the plant in the hole and fill it with soil, pressing down firmly to eliminate any air pockets. Water thoroughly after transplanting. Step 7: Watering and Nutrients Cannabis plants require regular watering, especially during the warmer days. Water your plants early in the morning or late in the evening to minimize evaporation. As they grow, your cannabis plants will also need additional nutrients. Use a balanced fertilizer that is high in nitrogen during the vegetative phase and switch to a phosphorus-rich fertilizer when the plants start flowering. Step 8: Pest and Weed Control Keep an eye out for pests and diseases. Common cannabis pests include aphids, spider mites, and whiteflies. Use organic pesticides or introduce beneficial insects like ladybugs to your garden to control pest populations. Regularly check your plants for signs of disease and remove any weeds that could compete with your cannabis for nutrients. Step 9: Pruning and Training Pruning and training your plants can help improve yield by exposing more of the plant to sunlight. Techniques such as topping (removing the top of the plant) and low-stress training (bending and tying the branches) can be effective. Step 10: Harvesting Harvest time depends on the strain and environmental conditions. Generally, cannabis is ready for harvest when the trichomes (tiny resin glands on the flowers) turn from clear to a milky white or amber color. Use shears to cut the branches, trim away the leaves, and hang the buds upside down in a cool, dark, and dry place to cure. Conclusion Growing cannabis outdoors from seeds can be a fulfilling venture if done correctly. With patience and care, you can cultivate robust plants that produce high-quality buds. Remember to always stay informed about the legal status of cannabis cultivation in your area and enjoy the process of growing your plants! |
 RSS Feed
